Ditch the instant and elevate the experience: brewing rich, flavorful coffee over a campfire is easier than you think with the right percolator.
Picture this: you’re nestled in your campsite as the sun gently rises, painting the sky with hues of gold and crimson. The crisp morning air fills your lungs, and the aroma of freshly brewed coffee completes the sensory symphony of your wilderness haven—no instant coffee packets needed! A campfire coffee percolator brings back that traditional sensory delight right to your campsite, and we’re here to help you unlock campfire coffee bliss.
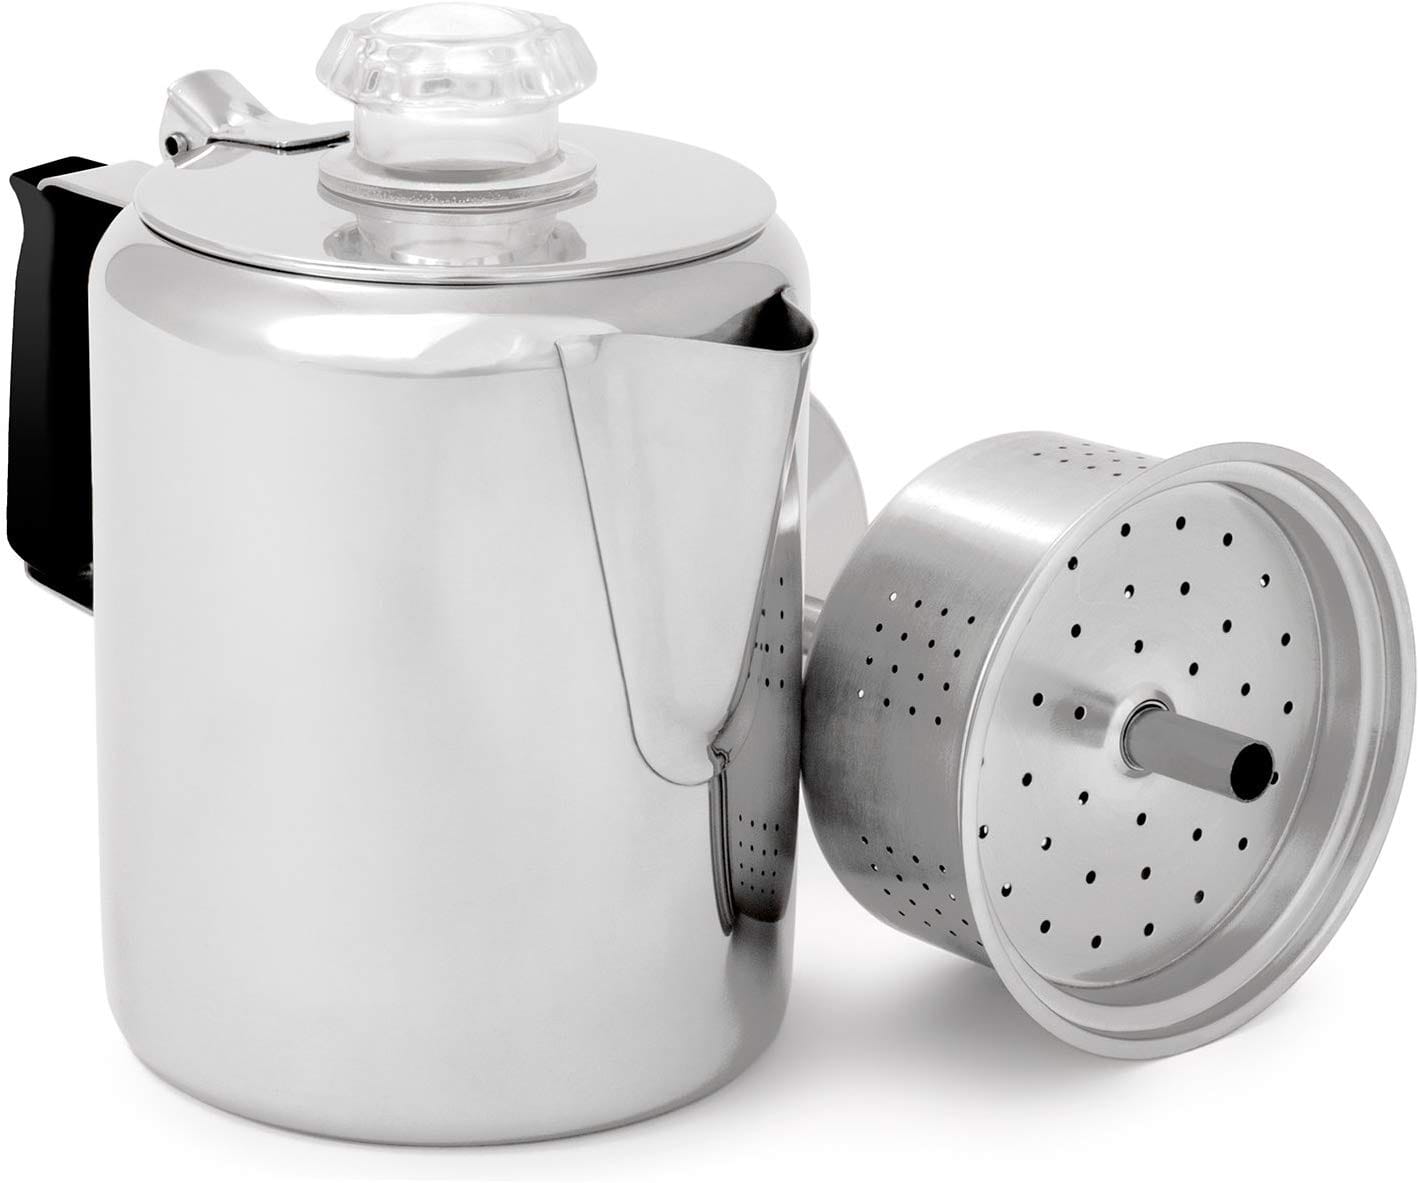
A camping percolator is a stovetop coffee maker that uses a cyclical boiling process to brew coffee. They are typically made from durable materials like stainless steel or enamelware to withstand the rigors of outdoor use.
Here’s how it works:
Water in the base is heated.
As the water boils, it’s forced up a central tube.
The hot water showers over the coffee grounds in the upper chamber.
The brewed coffee drips back down to continue the cycle.
This process repeats until the desired strength is reached.
Most percolators have a clear knob on the lid, allowing you to observe the “perking” action and gauge the coffee’s strength.
Why Choose a Campfire Percolator?
Beyond the romantic notion of brewing coffee over an open flame, campfire percolators offer a handful of benefits over other coffee-making methods:
Rich Flavor: The unique brewing process extracts bold, full-bodied flavor from your favorite coffee grounds.
Campfire Compatibility: Designed explicitly for use over campfires, camp stoves, or grills.
Durability: Constructed from robust materials to withstand outdoor conditions—accidental bumps and scrapes are no match for these sturdy brewers.
Versatility: Many models can be used for boiling water, cooking soups, or heating other liquids, making them a multi-functional addition to your camp kitchen.
Nostalgia Factor: Indulge in a traditional, sensory-rich coffee brewing experience that connects us to simpler times and the joy of slowing down.
Finding Your Perfect Percolator: A Buyer’s Guide
Just like choosing the perfect camping spot, selecting the right percolator can make all the difference in your campfire coffee experience. Consider these factors before making your purchase:
1. Capacity: How Many Coffee Lovers Are in Your Crew?
Solo Trips or Couples: A smaller percolator (1-3 cups) will be perfect.
Groups and Families: Opt for a larger capacity (8-12 cups) to satisfy everyone’s caffeine cravings.
2. Material: Durability vs. Aesthetics
Stainless Steel: The workhorse of the percolator world, stainless steel is incredibly durable, easy to clean, and resists rust and corrosion.
Enamelware: Enamelware offers that classic, nostalgic campfire aesthetic but requires a bit more care to prevent chipping or cracking.
3. Features: Little Extras That Enhance the Experience
Heat-Resistant Handles: Essential for safely handling a hot percolator over a campfire.
Built-in Whistle: Lets you know when the coffee is brewed to perfection – no more guessing games.
Percolator Insert/ Basket: Some models feature a removable insert that doubles as a basket for boiling water or cooking.
4. Price: Setting a Budget That Aligns With Your Needs
Campfire percolators range widely in price, from budget-friendly options to high-end models. Consider your intended usage and desired features to determine a reasonable budget that doesn’t break the bank.
Brewing Campfire Coffee Like a Pro: Step-by-Step Guide
You’ve got your percolator—now it’s time to brew! Follow these steps to unlock campfire coffee bliss:
Grind Your Beans (and Don’t Go Too Fine!): A medium-coarse grind is ideal for percolator brewing. Fine grinds can lead to over-extraction and a bitter taste.
Add Water to the Percolator: Fill the percolator’s base with the desired amount of water, following the manufacturer’s instructions.
Place the Percolator Insert: Insert the percolator’s upper chamber (containing the tube and filter basket) into the base.
Add Coffee Grounds: Add your desired amount of coffee grounds to the filter basket within the upper chamber. Remember, a coarser grind is key!
Place Over Heat Source: Position your percolator over your heat source, whether a campfire, camp stove, or grill. Ensure the heat is evenly distributed.
Observe the Perking Action: As the water heats, it will begin to “perk” up through the central tube. Keep an eye on the color of the coffee in the clear knob (if your percolator has one) to gauge the strength.
Timing is Key: Brewing time varies depending on desired strength and heat source but typically takes 5-10 minutes. Don’t wander too far!
Remove from Heat and Enjoy: Carefully remove the percolator from the heat source once the desired strength is achieved. Allow the coffee to settle for a minute or two before pouring and savoring every sip.
Tips for Avoiding Bitter Campfire Coffee:
Use Freshly Ground Coffee: Freshly ground beans always yield the best flavor.
Don’t Over-Perk: Over-extracted coffee will taste bitter. Monitor the brewing process closely and remove from heat when ready.
Control the Heat: Low and slow is the key to avoiding bitterness. Use low to medium heat and avoid boiling the coffee violently.
Campfire Coffee Beyond the Brew: Untapped Potential
Target a Wider Audience: Campfire coffee isn’t just for campers! Market percolators to van lifers, off-grid enthusiasts, and those seeking a simple, non-electric brewing method.
Showcase Versatility: Explore and highlight the many uses of a percolator beyond just coffee. They’re great for making teas, soups, stews, and more!
Emphasize Sustainability: Highlight the eco-friendly nature of using a reusable, non-electric coffee maker.
Build a Community: Encourage reader interaction by inviting them to share their favorite campfire coffee recipes, tips, and experiences in the comments.
Di Mana Teko Kopi Coletti Dibuat?
Curious about the origins of those beloved Coletti coffee percolators? We were too! We contacted Coletti directly and examined their product packaging to uncover the source of their renowned quality and craftsmanship.
Coletti coffee percolators are manufactured in two locations chosen for their expertise and access to top-notch materials:
Italy: Production takes place in Coletti’s modern factory, drawing on Italy’s rich history of craftsmanship and manufacturing.
Brazil: Coletti also utilizes a state-of-the-art production facility in Brazil, known for its access to high-quality materials and skilled labor.
This strategic dual-location manufacturing process likely contributes to the consistently high-quality and durability of Coletti coffee percolators. Additionally, Coletti emphasizes using premium materials in their manufacturing, further enhancing the longevity and performance of their products.
While we’ve uncovered some key details about the making of Coletti percolators, research into their precise processes and techniques is ongoing. We can expect to learn even more about the journey from raw materials to a perfect cup of campfire coffee in the future.
Ready to Elevate Your Campfire Coffee Game?
With the right percolator and a dash of adventurous spirit, you’ll be brewing barista-worthy coffee amidst the great outdoors in no time!
If you want to explore different coffee types for your next outdoor adventure, discover the difference between cannellini vs Great Northern beans. And if you’re looking for a special holiday menu to enjoy around the campfire, learn how to prepare a delicious feast of the Seven Fishes menu to celebrate Christmas Eve. Happy camping and happy sipping!
Hello, My love for writing is rivaled only by my passion for in-depth research. While many may skim the surface, I dive deep, seeking the hidden gems of information that give a story texture and depth. Every word I write is backed by hours of exploration, ensuring that my work is not just compelling, but also meticulously accurate. Join me on a journey where every piece is a deep dive into the realms of knowledge and storytelling.